

D-Tools’ System Integrator (SI) features seamless integration with Visio, making it easy to design systems and connect these drawings with work orders so your technicians can easily access them when performing field service. Below, we share some useful tutorials on how to change a shape in Visio, along with some Visio change shape shortcuts.
How to Add and Select Shapes in Visio
Before we talk about how to change a shape in Visio, let’s go over the basics of how to add and select shapes.
Adding Shapes
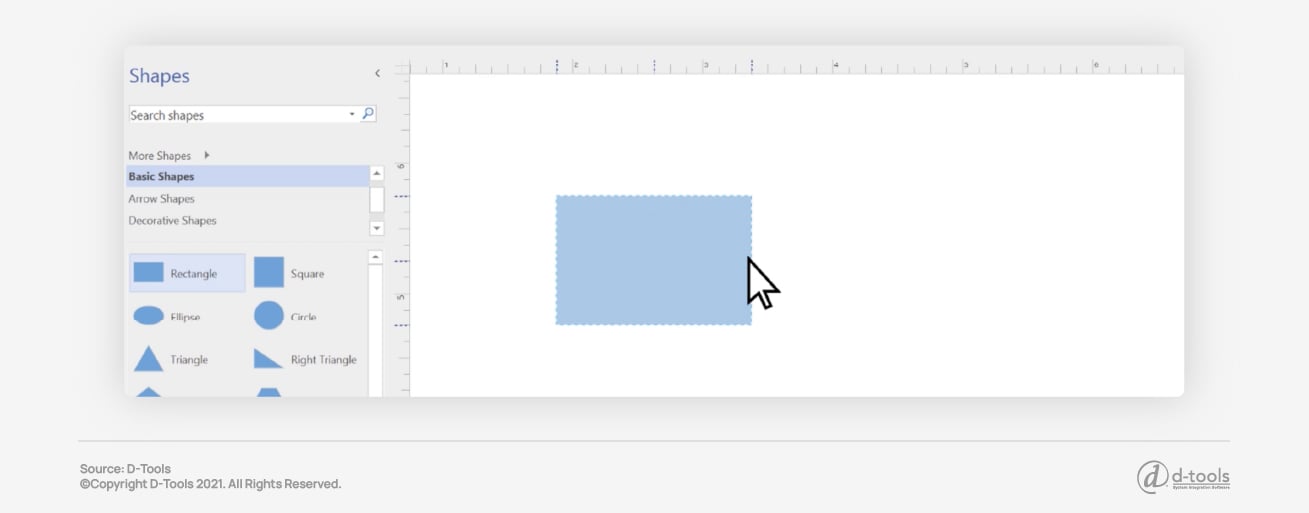
- Choose the stencil with the shape you’d like to add to your drawing.
- Select that shape, then drag it onto the drawing page.
- Point to the shape you’ve just added, and point to the arrow that shows the direction of the next shape you want to add to your drawing.
- Select the shape you want to add next.
Selecting Shapes
- To select a single shape: Select Home > Pointer Tool, then point to a shape until you see an arrow with four heads. Select the shape.
- To select multiple shapes within a rectangular area: Select Home > Select > Area Select and drag a rectangle around the shapes you’d like to select.
- To select multiple shapes in a freeform area: Select Home > Select > Lasso Select and drag a freeform lasso around the shapes you’d like to select.
- To select multiple shapes separated by other shapes: To select a specific type of object: Select Home > Select > Select by Type, select the type of object, and click OK.
- To remove a shape from a selection: Press Shift and select the shape you want to remove.
- To cancel a selection: Click a blank area on the diagram, or press Esc.
How to Change Shapes in Visio
Here are some simple Visio shape change shortcuts:
Changing a Shape into Another Shape
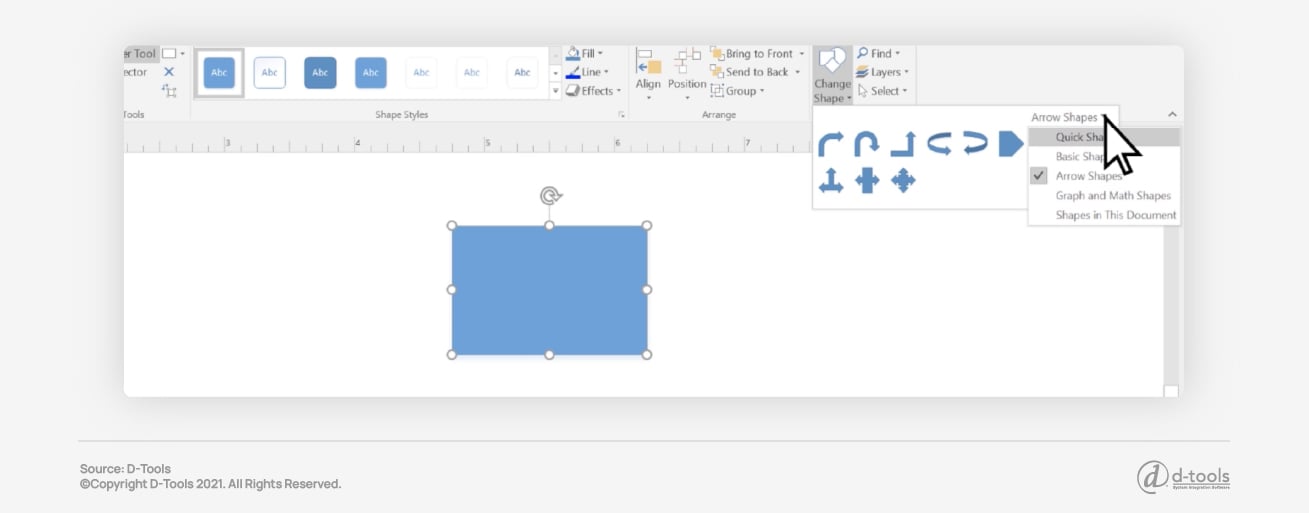
- Select the shape you’d like to change.
- Go to Home > Change Shape.
- Browse the available shapes and stencils until you find the shape you want.
- Select a shape. Any text and formatting applied to the original shape will be applied to the new shape.
Rotating or Flipping Shapes
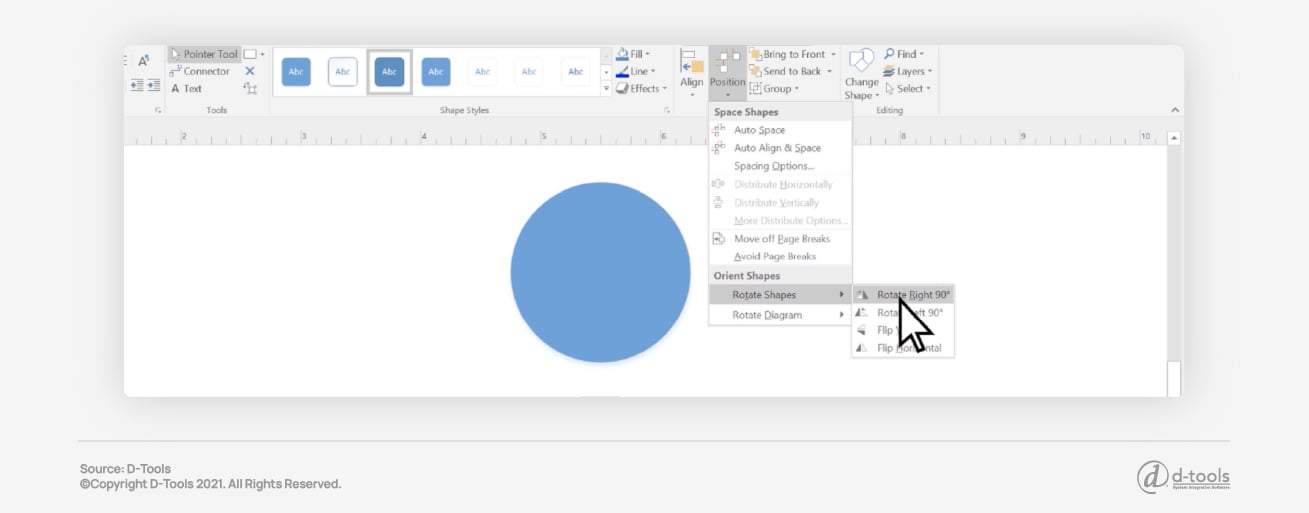
- To rotate a shape 90 degrees: Select a shape, then go to Home > Position > Rotate Shapes, and select either Rotate Left 90° or Rotate Right 90°.
- To flip a shape vertically: select the shape, then go to Home > Position > Rotate Shapes > Flip Vertical.
- To flip a shape horizontally: Select the shape, then select Home > Position > Rotate Shapes > Flip Horizontal.
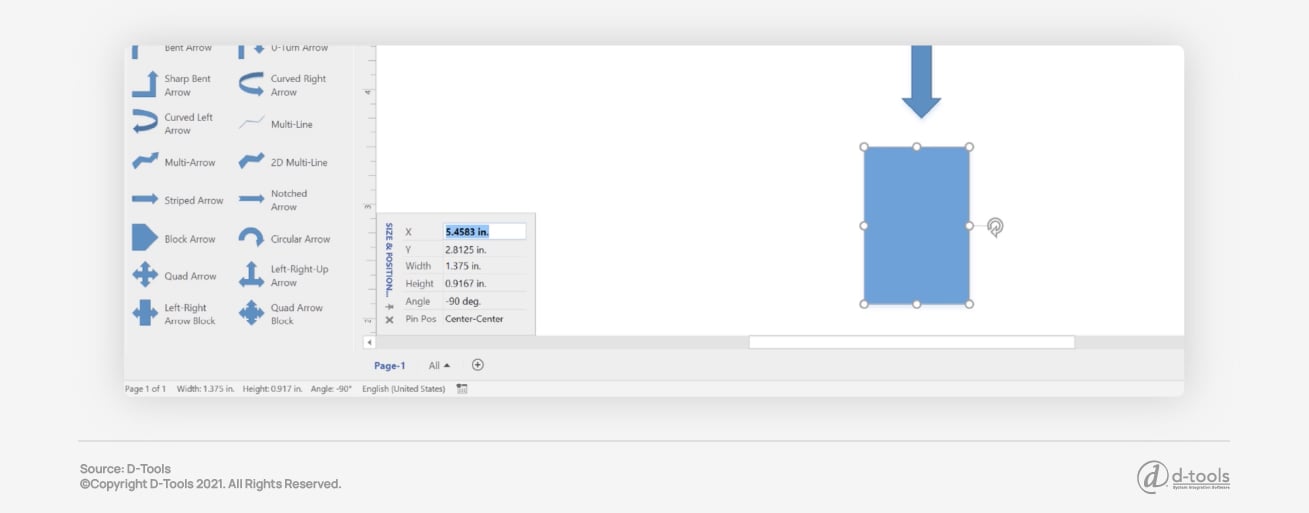
- To rotate a shape precisely: Select the shape, then select View > Task Panes > Size & Position, and type in your desired values for Angle.
Moving Shapes
- To move a shape: Select the shape you’d like to move and drag it to a new position.
- To nudge a shape: Select the shape and use an arrow key to move it.
- To move a shape one pixel at a time: Select the shape and hit the Shift key while pressing an arrow key.
- To move a shape precisely: Select the shape, then select View > Task Panes > Size & Position, and type in new values for X, Y, Begin X, Begin Y, End X, or End Y.
Changing the Look of Shapes

- Select a shape.
- Go to the Home tab, then choose your desired style option:
-
- Quick Styles - Choose a line and fill combination.
- Fill - Choose a gradient, color, or pattern to fill the shape.
- Line - Choose the line color, thickness, or type.
- Effects - Choose a reflection, shadow, glow, or 3-D effect.
How to Replace One Shape with Another in Visio
Visio allows you to replace any existing shape with a completely different shape, yet still retain the original shape's key characteristics, including position, connections, formatting, shape data, and shape text.
- Select the shape or shapes you want to replace in your diagram.
- From the Home tab, find the Editing group on the far right side, then select Change Shape. You’ll see a drop-down menu that shows you a gallery of related shapes that you can choose from. Switch categories to see a different group of shapes.
- Select the shape you’d like to change the original to. You can replace two-dimensional shapes with other two-dimensional shapes and one-dimensional shapes with other one-dimensional shapes, like replacing one connector with another of a different type.
How to Edit a Master Shape in Visio
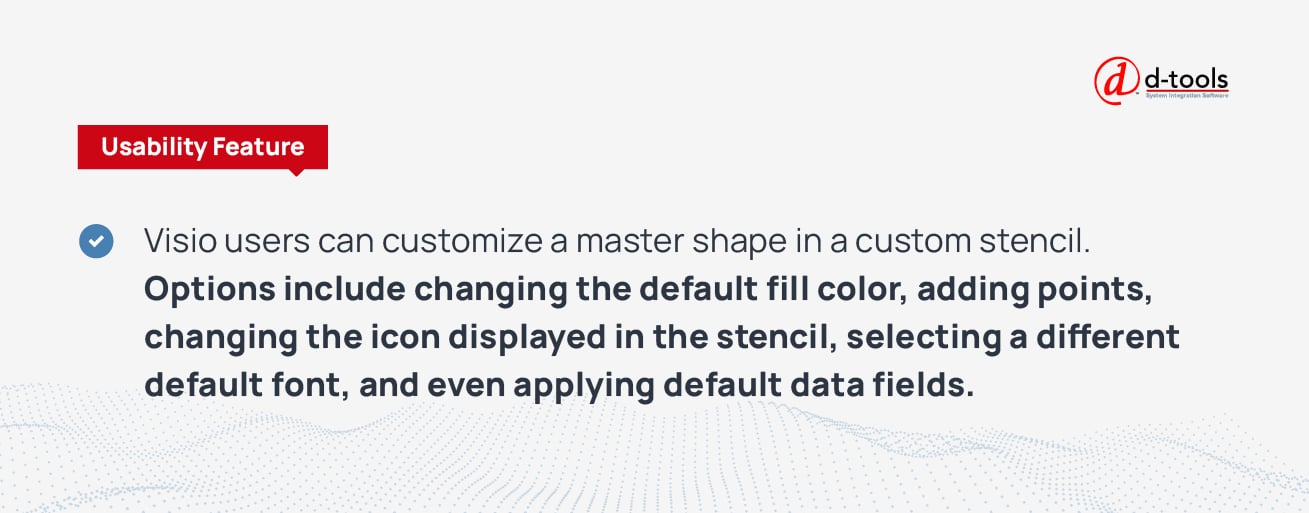
Visio users can customize a master shape in a custom stencil. Options include changing the default fill color, adding points, changing the icon displayed in the stencil, selecting a different default font, and even applying default data fields.
To edit a master shape
- Open a new stencil, your Favorites stencil, the Document Stencil, or the custom stencil that contains the master shape you’d like to edit.
- If the stencil is not editable, right-click the stencil title bar, and then click Edit Stencil. The icon in the stencil title bar will change to show that it is now editable.
- Right-click on the master shape that you’d like to edit, then point to Edit Master, and choose one of the following options:
- To change how the master shape appears on a drawing page, select Edit Master Shape.
- To change how the master shape appears on the stencil in the Shapes window, select Edit Icon Image. A new window will open containing the master shape or icon that you need to edit.
- Make the changes to the master shape in the new window.
- Close the new window after you’ve finished editing the shape. When you receive the prompt asking you if you want to update the shape, click Yes to save the changes.
>> Related Read: Configuring Visio Shape Defaults for D-Tools Products in System Integrator
How to Add and Edit Text on a Shape in Visio
Sometimes, you may need to change a shape in Visio by adding text to it. Here’s how to do it:
To add text to a shape
- Select the shape you want to work with.
- Begin typing. When you type while a shape is selected, Visio switches to text editing mode and zooms in on the shape.
- When you’re finished adding text, press Esc or click outside the shape. Visio will restore the original view if it zoomed in when you started to type.
To edit text on a shape
- Double-click on the shape that you need to edit. Visio will switch to text editing and zoom in on the shape you’ve selected.
- When you’re finished adding text, press Esc or click outside of the shape. Visio will then restore the original view.
To change the formatting of text on a shape
- Double-click on the shape that has the text you’d like to format.
- From the Home tab, use the tools in the Font and Paragraph groups to format the text. You can also press F11 to open the Text dialog box, which allows you to set many types of text formatting.
How to Copy a Shape in Visio
Visio supports standard keyboard shortcuts for cutting and pasting (Ctrl+C and Ctrl+V), but you can also duplicate a shape while dragging it into place by using the following steps:
To duplicate a shape in your diagram or drawing by dragging
- Press and hold the Ctrl key while dragging the shape you want to duplicate. Visio will create a copy of the selected shape under the mouse arrow.
- Place the duplicate shape where you want it by releasing the mouse button.
How to Find Shape-Specific Commands in Visio
There are some commands in Visio that are unique to different shapes. If you’d like to access these, follow the steps below:
To display shape-specific commands
- Right-click on the shape you want to inspect. Visio will display a shortcut menu where you’ll find shape-specific commands.
Some shapes have special control handles that can be used to modify a shape. Each control handle has a function specific to the shape on which it appears. Select the shape you’d like to work with and drag the control handle.
To display the function of a special control handle
- Select the shape you’d like to inspect.
- Hover the arrow pointer over the special control handle. Visio will display text that describes the handle's function. You can also drag the handle to see what happens.
How to Change Shapes in Visio Using the Shape Data Window
In D-Tools’ System Integrator, you can also update shapes in Visio utilizing the Visio Shape Data Window. This will allow you to customize your shape, color, etc., and maintain these settings for future use. Here’s how to change a shape in Visio via SI:
- First, drag your item over to the drawing page. Right-click on your item, then select D-Tools> Shape> Change shape.
- This will bring up the stencil menu where you can choose which shape you wish to use. Once selected, you can choose whether this will be the default shape for this item or the default shape for the category/subcategory at the bottom of the window. You can also choose whether to keep the properties for the shape as well.
- There is an easy way to change those properties without having to dive into the shape itself. Click on the data tab (if you do not have the data tab at the top of your Visio window simply click on file>options>customize ribbon). Under Main Tabs, simply check the box next to data.
- In the Data tab, click on the box next to the Shape Data window. With this option checked, you can now change the properties of your shape by clicking on it, then using the shape data window to quickly make the changes you need to make.
- Once you are done making adjustments to your shape, anytime you bring that item into your drawing, it will have the predetermined shape and properties you have just set.

Find Out More About D-Tools Software
Utilizing Visio for projects, whether on its own or integrated through business software solutions such as D-Tools System Integrator, eliminates scope creep and re-work by clearly and completely documenting system designs in Visio and/or AutoCAD.
Learn how D-Tools’ software can add efficiency to your processes from initial client contract through system design and field service management. Request a demo today.
Article originally published January 2020. Updated November 2021.
